Artwork sizing field guide
How to Size DTF Transfers: Size Chart & Fit Calculator
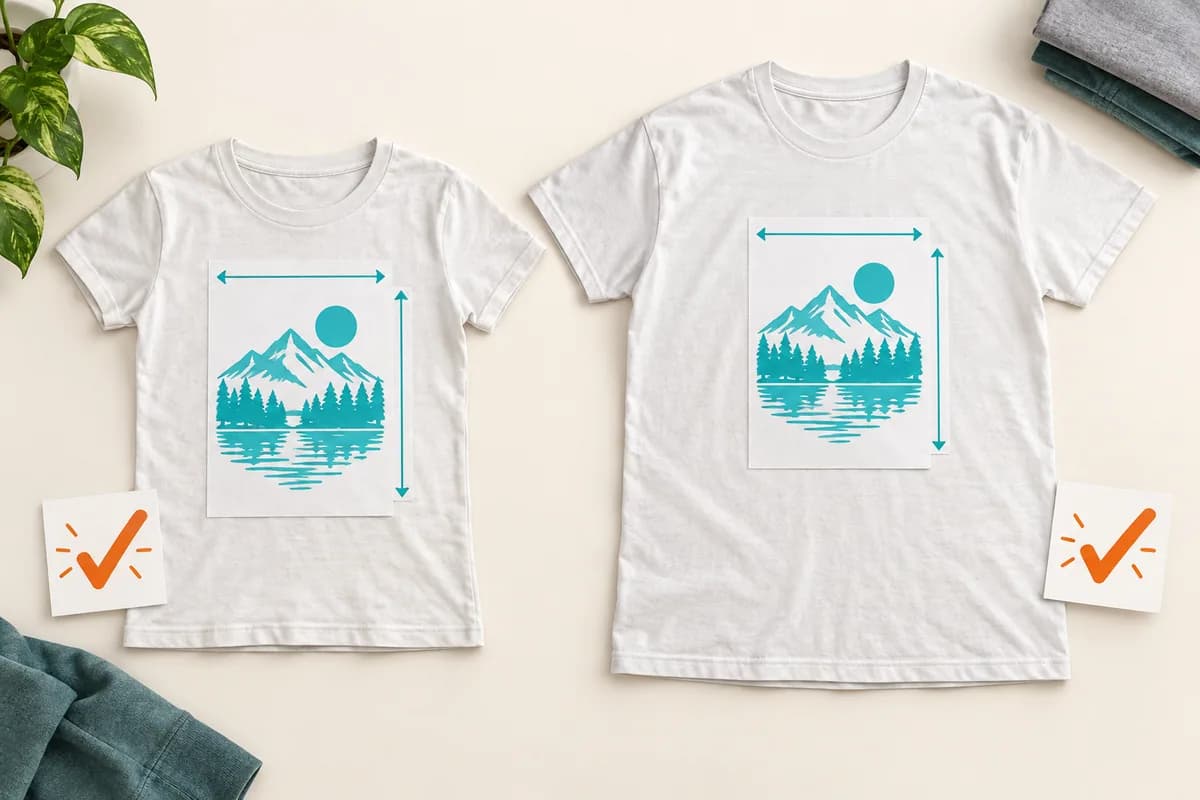
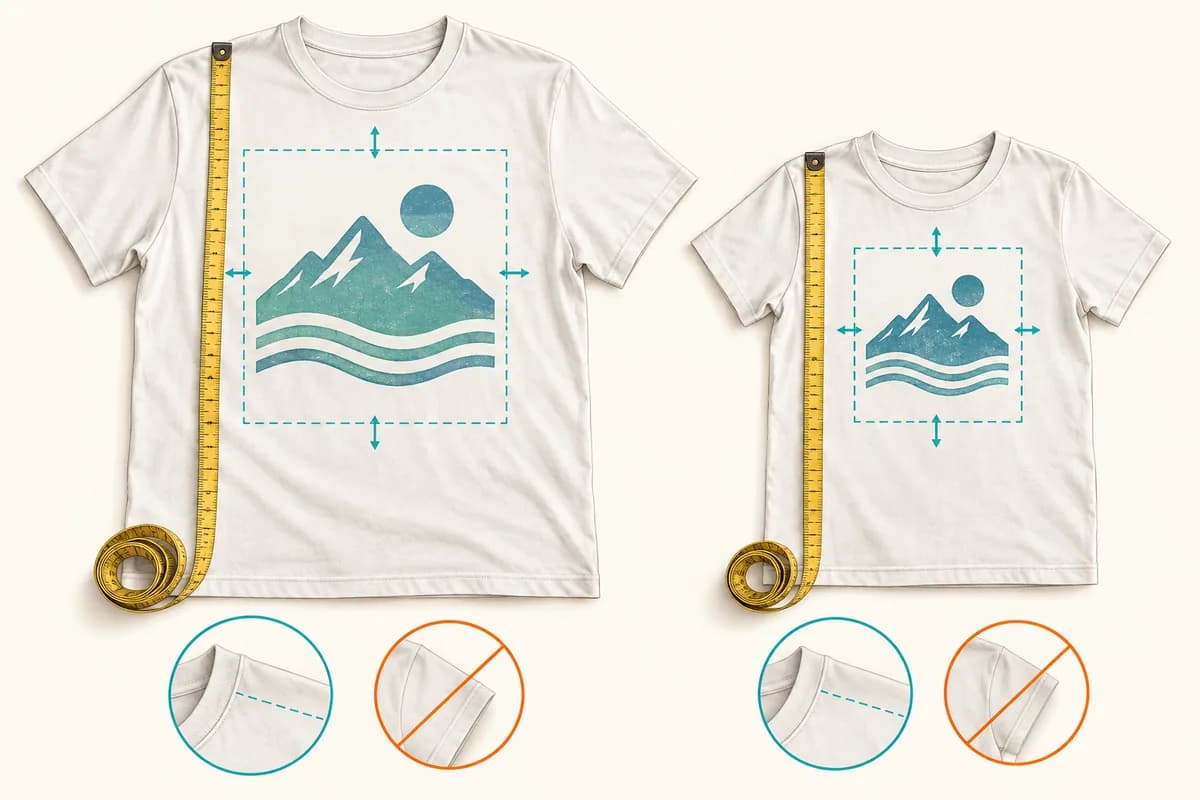
Start around 11 inches wide for an adult front, 8–9 inches for youth fronts, or 4 inches for an adult pocket print. Then check the proportional height against the actual garment. These are starting points from our sizing video; the fit depends on your artwork and garment.
Calculate your transfer fit ↓No contact details needed. Use your own garment measurements.
By AMS Transfers ·
Sizing demonstration: Mic | AMSTransfers
The AMS sizing video demonstrates these front and left-chest (pocket-size) starting widths:
| Placement shown in the Short | Starting width |
|---|---|
| Adult full front | 11 inches |
| Youth medium full front | 8 inches |
| Youth large / XL full front | 9 inches |
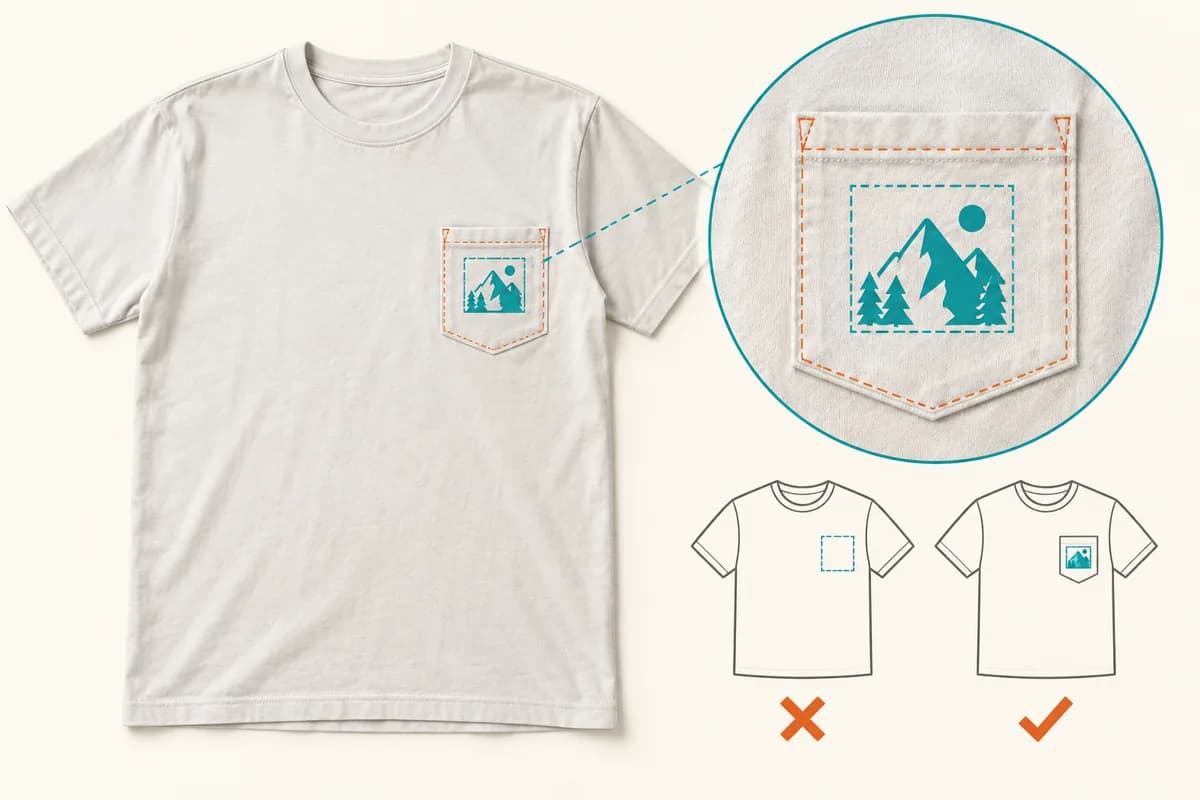
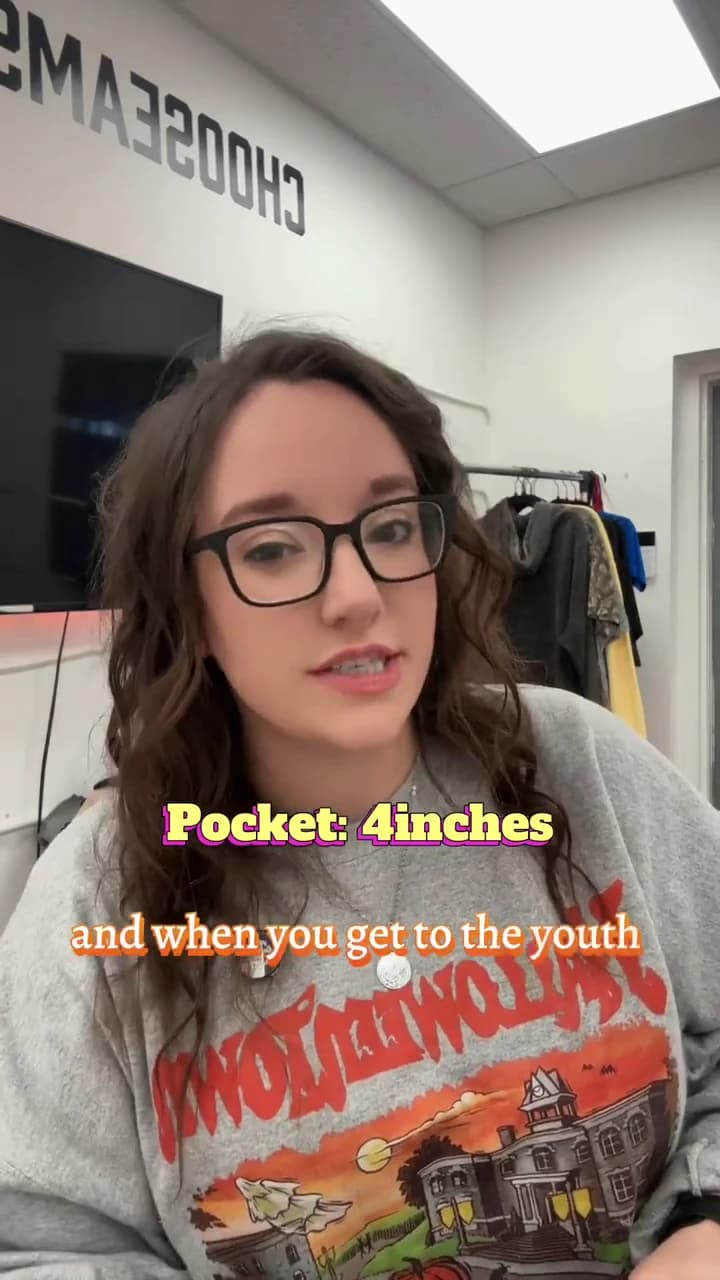
| Adult pocket-size print | 4 inches |
| Youth large pocket-size print | 3.5 inches |
| Youth small / medium pocket-size print | 2.5 inches |
Use the chart to choose a width, then use the calculator below to check the matching height.
Free sizing tool · no contact details needed
Find your proportional transfer size
Use the same unit for both original artwork dimensions: pixels or inches work. Enter your desired print width and measured garment area in inches. The tool keeps the artwork’s proportions and fits it inside both garment bounds.
Loads a 2:3 artwork ratio, a desired width of 10 in and a measured area of 10 × 12 in. Replace the example with your measurements; garment, placement and quantity stay as entered.
Measure the visible design, excluding transparent padding.
Use the same source dimensions as the width.
The maximum width you want on this garment.
Leave room for seams, pockets and platen access.
Measure the area you can actually press flat.
Use pixels across the visible design, excluding transparent margins.
Enter five positive measurements to calculate a proportional fit.
Enter five positive measurements above to see your result. Invalid values block the calculation.
A geometric fit does not confirm press access, artwork quality or production suitability. Check seams, zippers, pockets and the actual platen. Transparent file padding can make the visible print smaller than the ordered file dimensions.
Copying does not send an order or upload artwork. Review the request, then share it with your printer when you are ready.
Start with the garment in front of you
“because you want it to look like it actually fits on the shirt”Mic | AMSTransfers, 00:58 in the Short
Use the demonstrated sizes to get started, then measure your own placement. Pockets, seams, zippers and the available press can reduce the area you can use. The measurement and proportion method below extends the video’s starting examples.
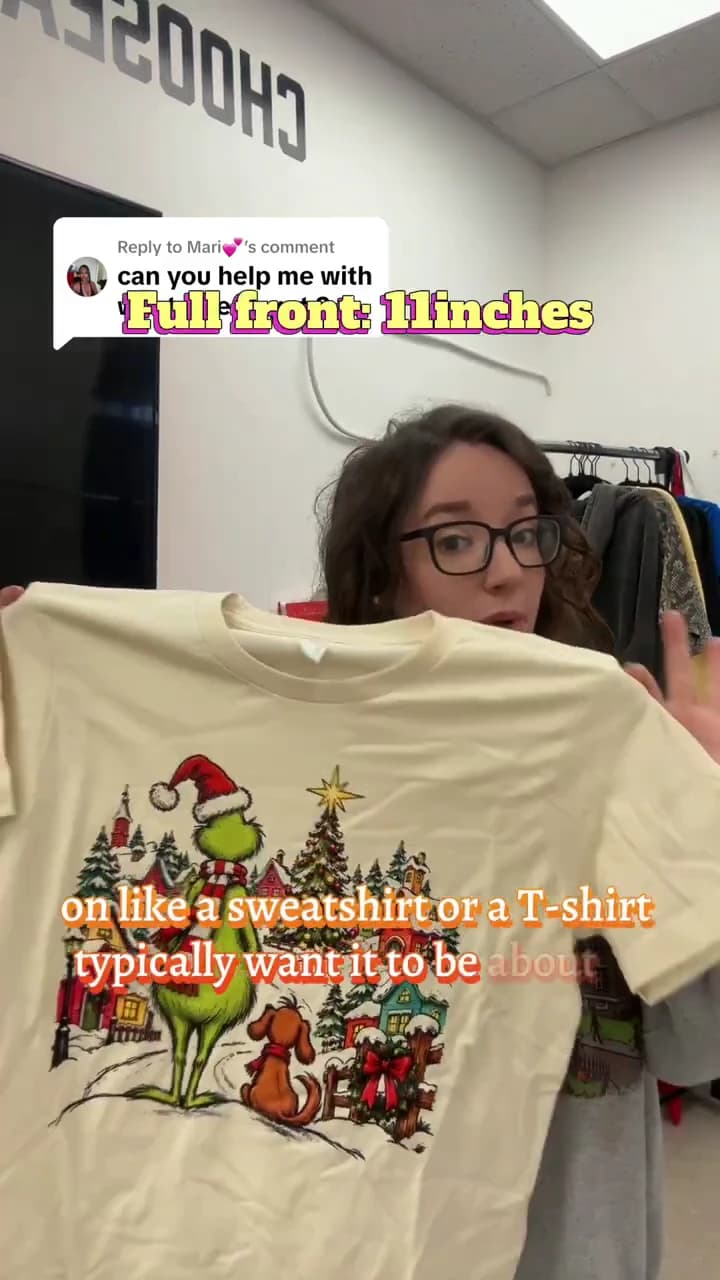
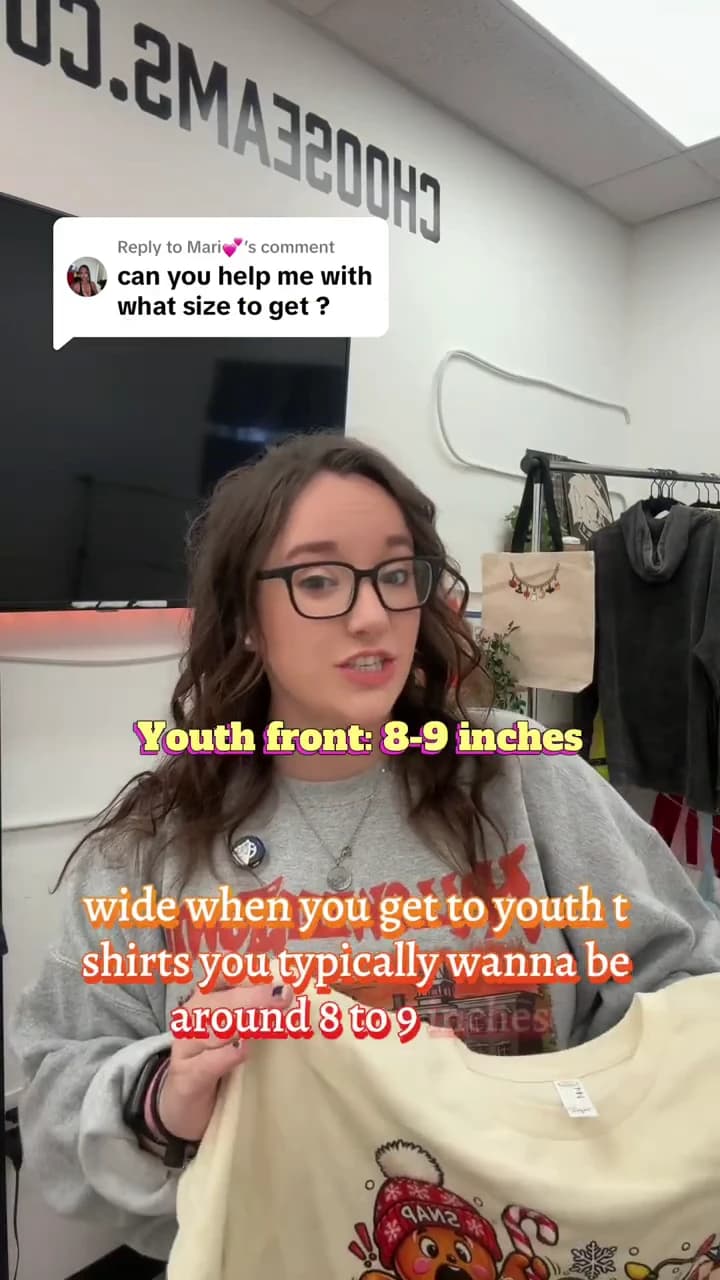
Watch the full AMS sizing demonstration · 2:06
Published October 13, 2026 by Mic | AMSTransfers. Source frames here come from that video; generated illustrations below explain the measurement method.
Measure, calculate, test, record: four steps before ordering
1. Measure the usable area on the actual garment
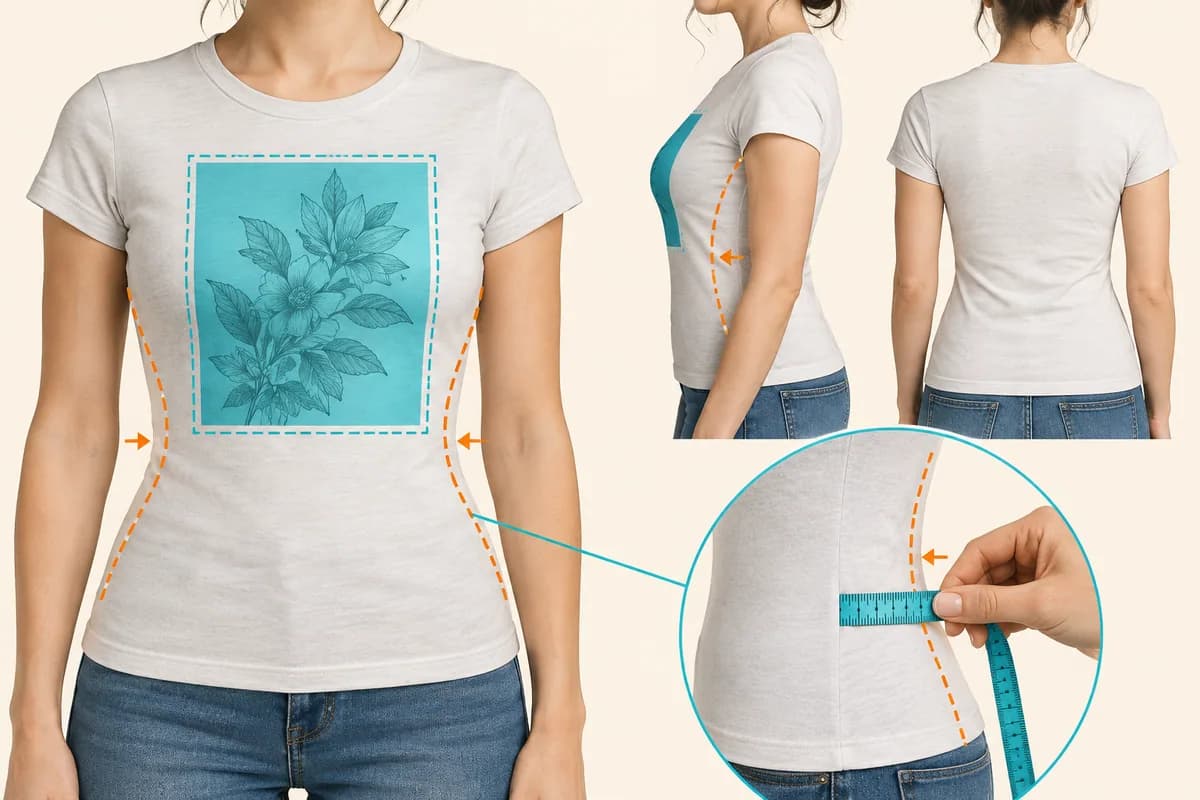
Lay the garment flat and smooth the placement. Decide where the artwork should sit, then measure an unobstructed rectangle there. Record its width and height. A shirt’s chest measurement is not its printable width.
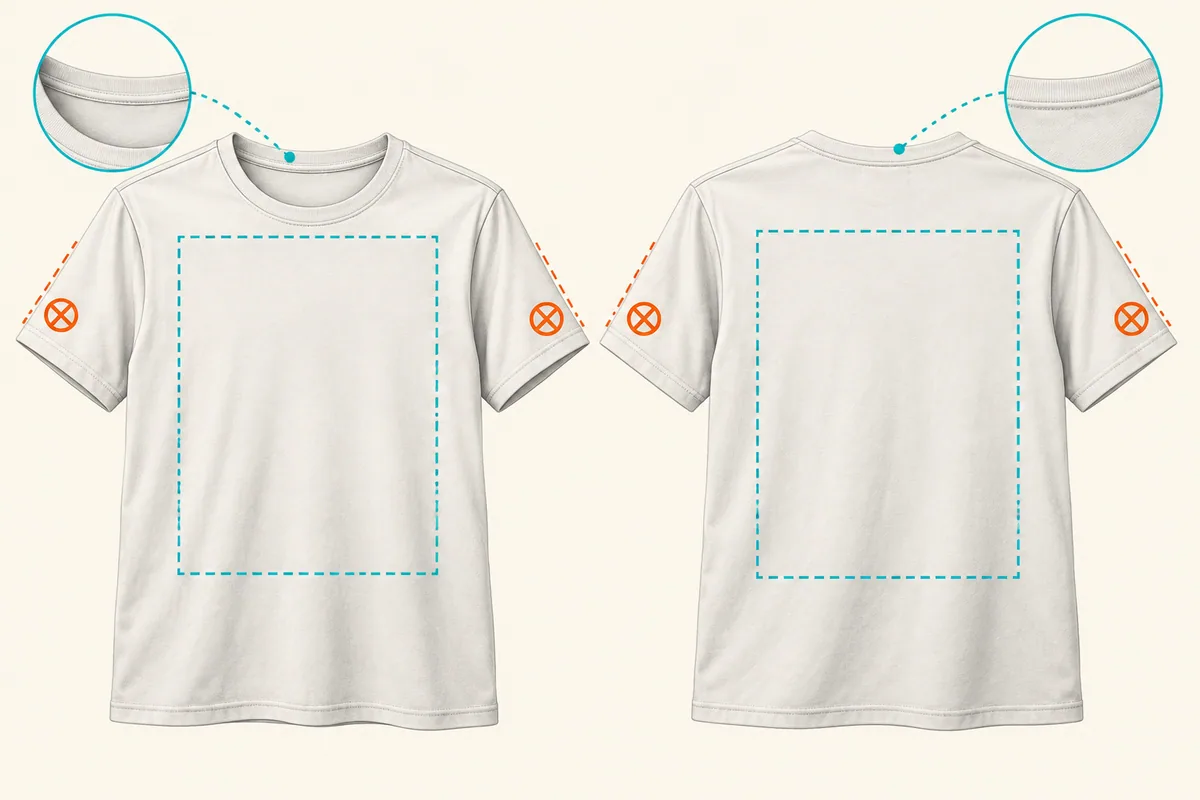
Check the smallest garment that will receive this version. Look for a pocket opening, raised seam, zipper, hoodie pouch, ribbing or anything that changes how the area can lie on the press. Keep your intended spacing around the artwork within your measurements. Do not count the entire front panel just because fabric is visible.
For example, if you choose a hypothetical 10-inch-wide by 12-inch-tall usable area, those are the bounds you give the calculator. They are not an AMS maximum or a specification for a particular shirt.
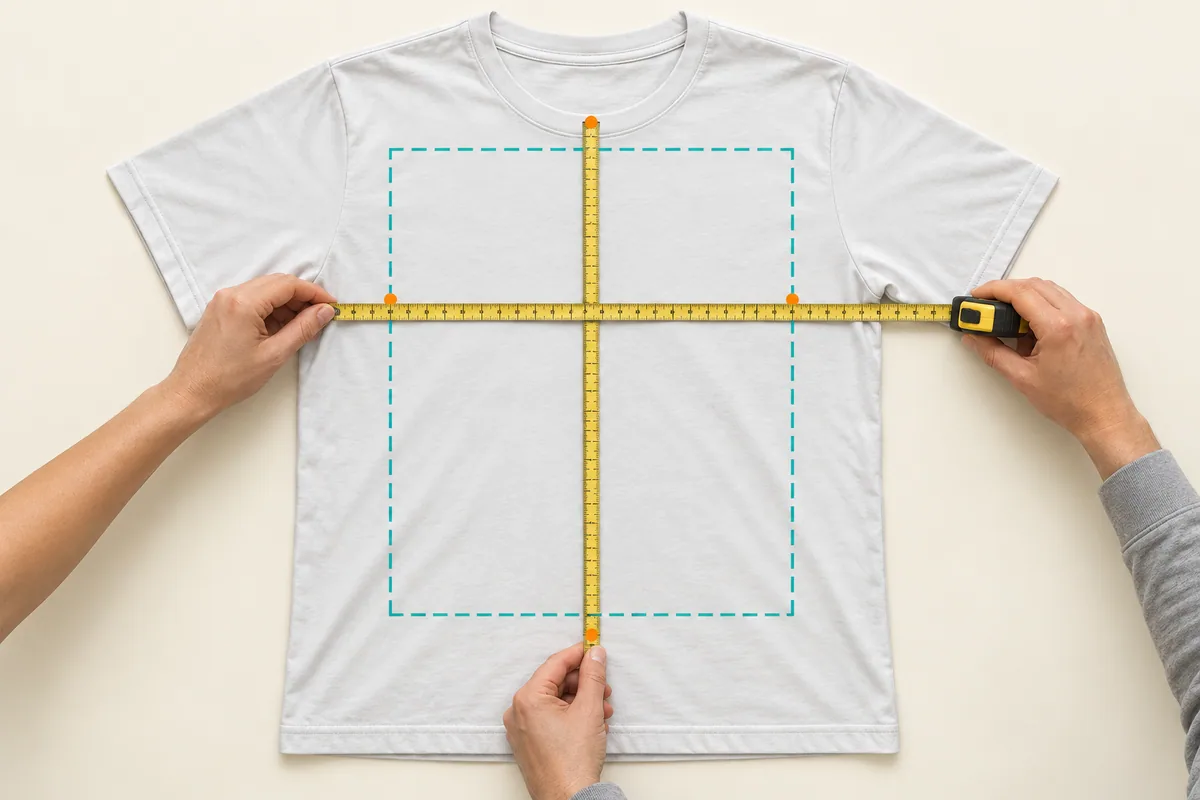
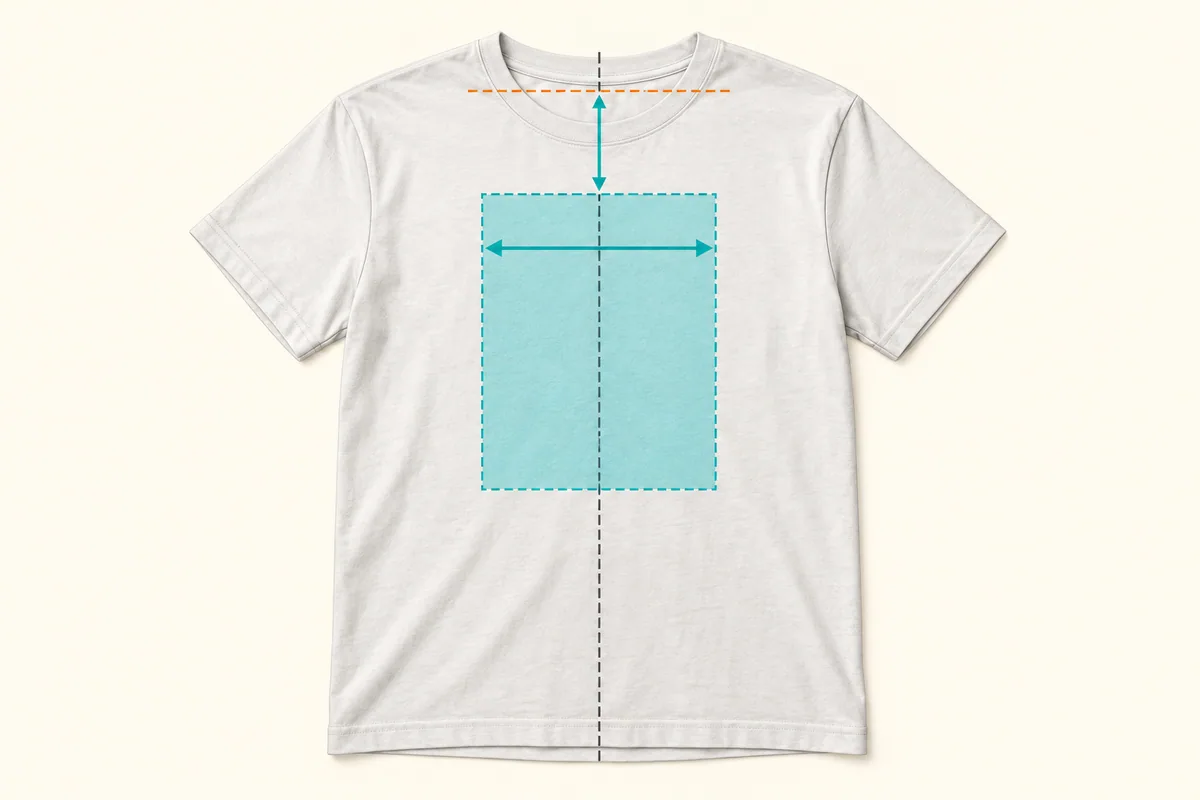
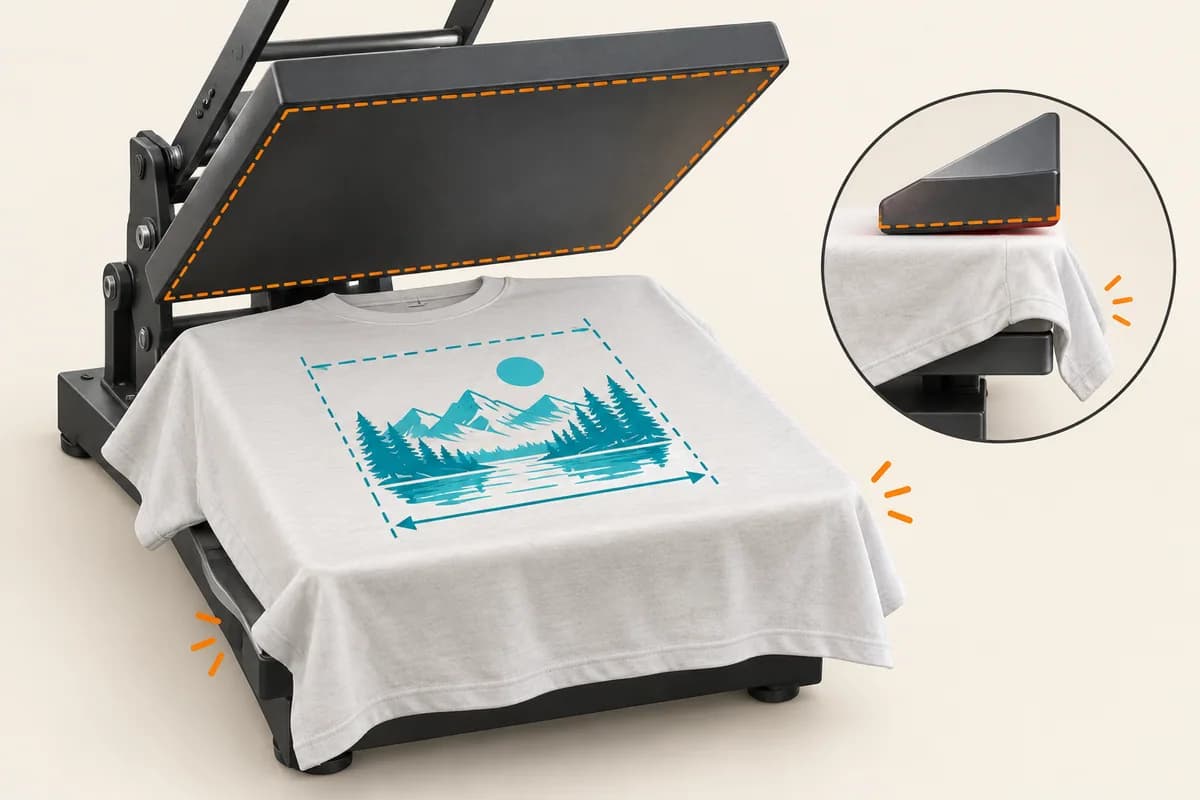
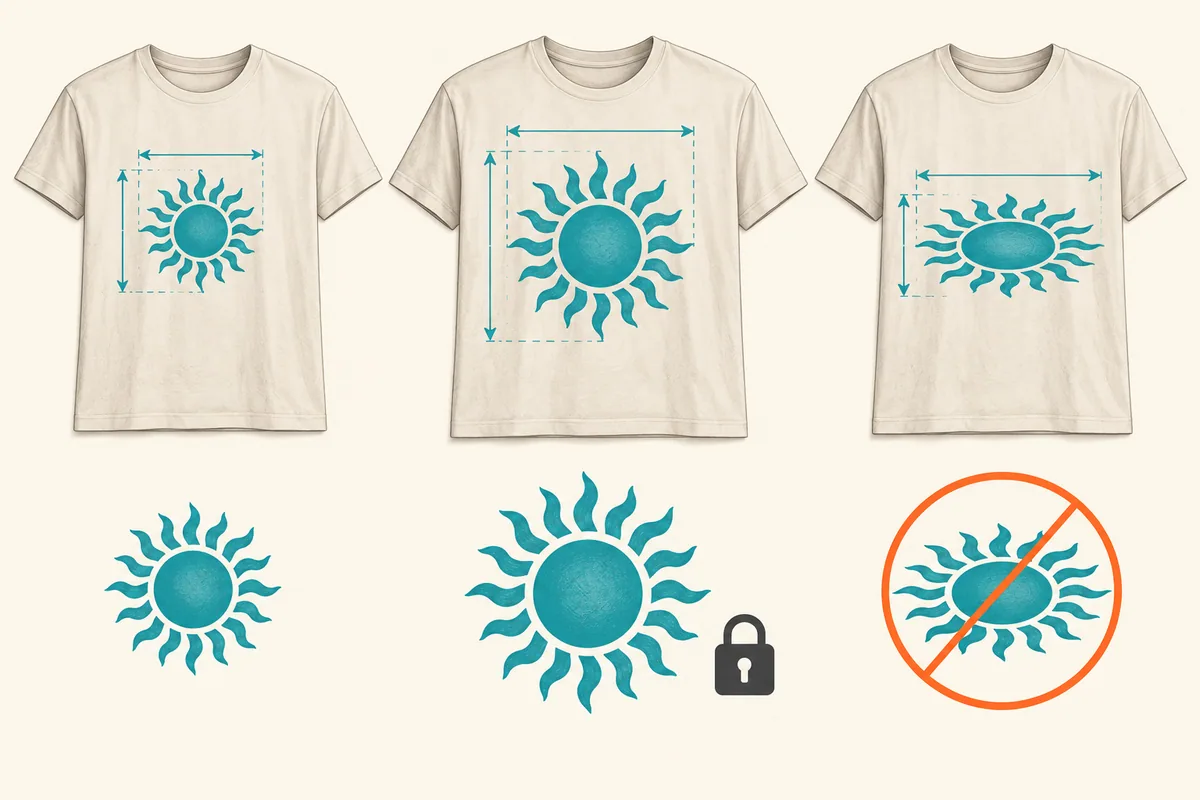
2. Size the visible artwork and lock its proportions
Use the width and height of the artwork you intend to print. Check for empty transparent space around it before taking those measurements.
| Measurement | What it tells you |
|---|---|
| Image canvas | The whole file rectangle, including blank padding |
| Visible artwork bounds | The rectangle around the design itself |
| Usable garment area | The space you measured for that placement |
| Final transfer dimensions | The print width and proportional height you intend to order |
Suppose a 12-inch-wide canvas contains an 8-inch-wide logo, with transparent padding on each side. Scaling the canvas to 10 inches makes the visible logo about 6.67 inches wide: 10 × 8 ÷ 12. Entering “10 inches” did not make the logo 10 inches wide.
Trim accidental padding or confirm how the ordering tool handles it. Keep intentional spacing within the design, such as the gap between two text lines. Check the artwork requirements before you finalize the file.
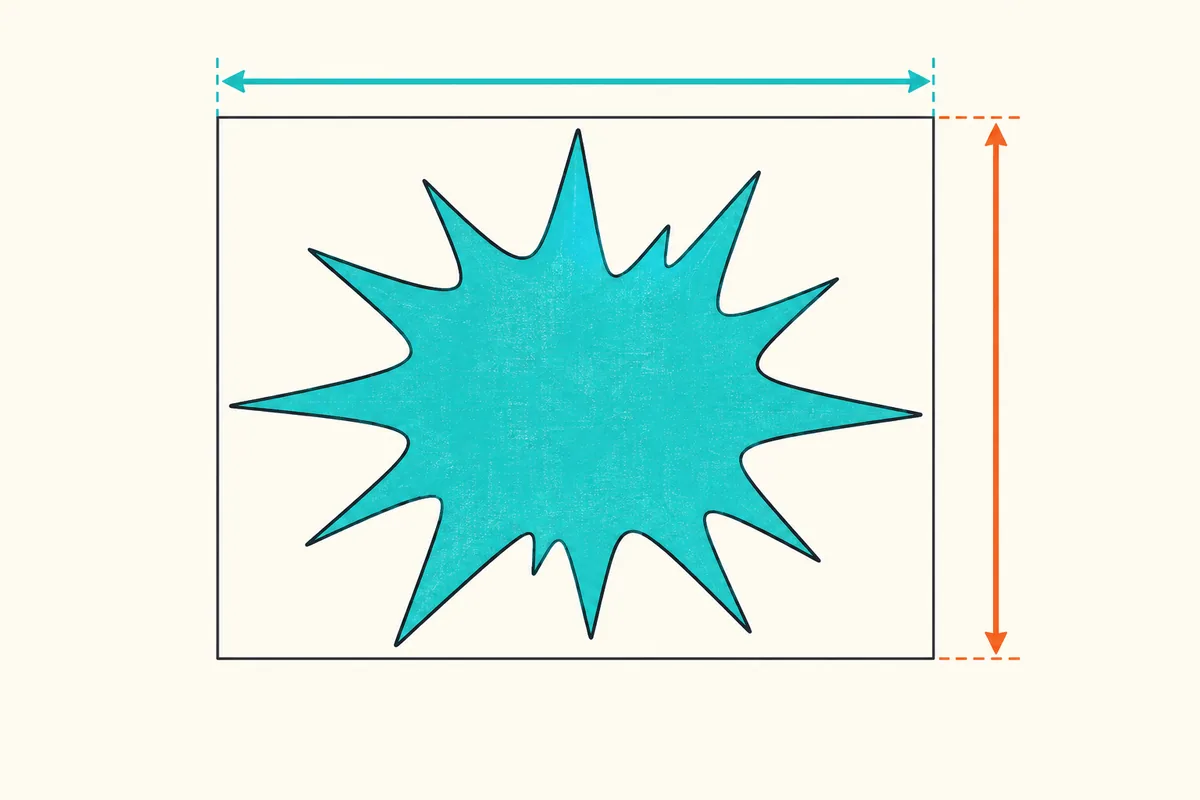
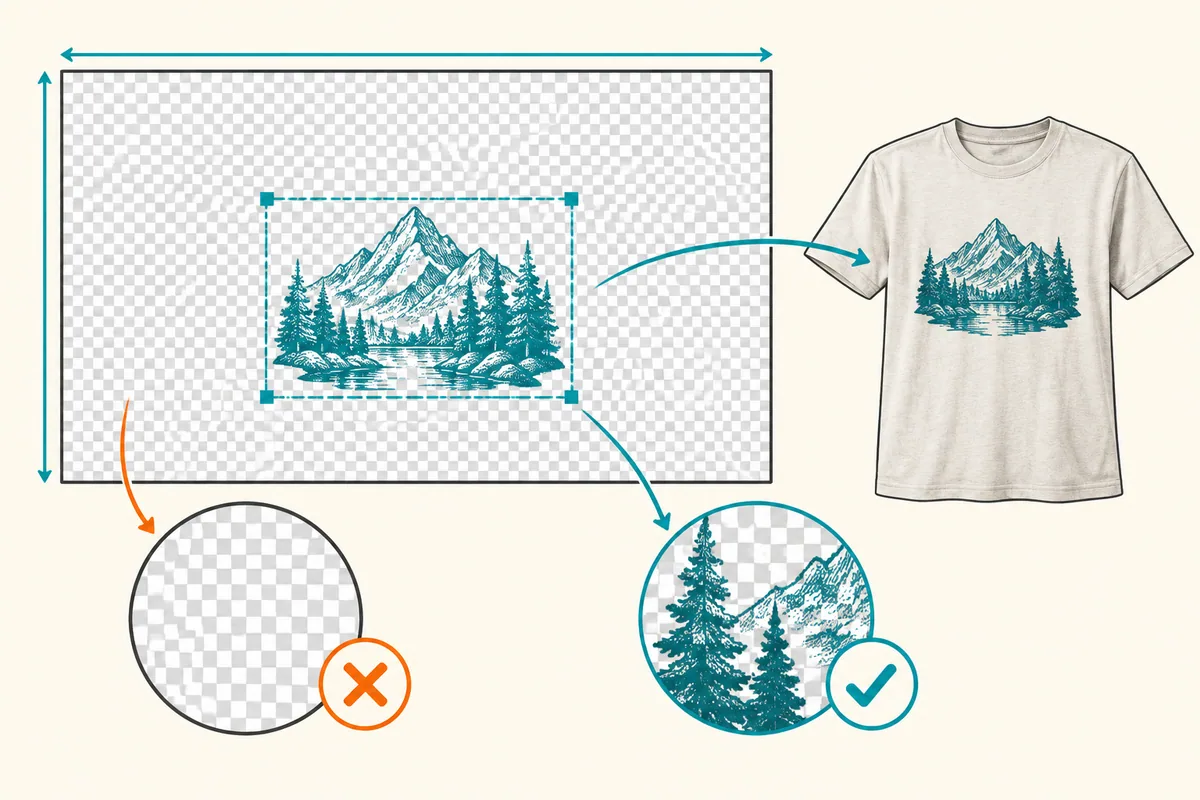
3. Calculate the other dimension and check both
Lock the aspect ratio. Changing width and height independently stretches the design.
Final height = chosen width × original visible height ÷ original visible width.
For artwork with a 2:3 width-to-height ratio, a 10-inch width produces a 15-inch height:
10 × 3 ÷ 2 = 15 inches tall
That will not fit the hypothetical 10×12-inch usable area. Let height control the size instead:
12 × 2 ÷ 3 = 8 inches wide
The proportional result is 8×12 inches. It fits both bounds, though the width is smaller than your first choice.
| Hypothetical artwork and measured area | Desired width | Proportional result | Limiting factor |
|---|---|---|---|
| Tall 2:3 art; 10×12-inch area | 10 inches | 8×12 inches | Height |
| Wide 2:1 art; 8×10-inch area | 10 inches | 8×4 inches | Width |
| Square art; 12×12-inch area | 9 inches | 9×9 inches | Your desired width |
The largest mathematical fit is not automatically the best-looking print. You can choose a smaller width for more breathing room. The calculator will not enlarge artwork beyond the width you requested.
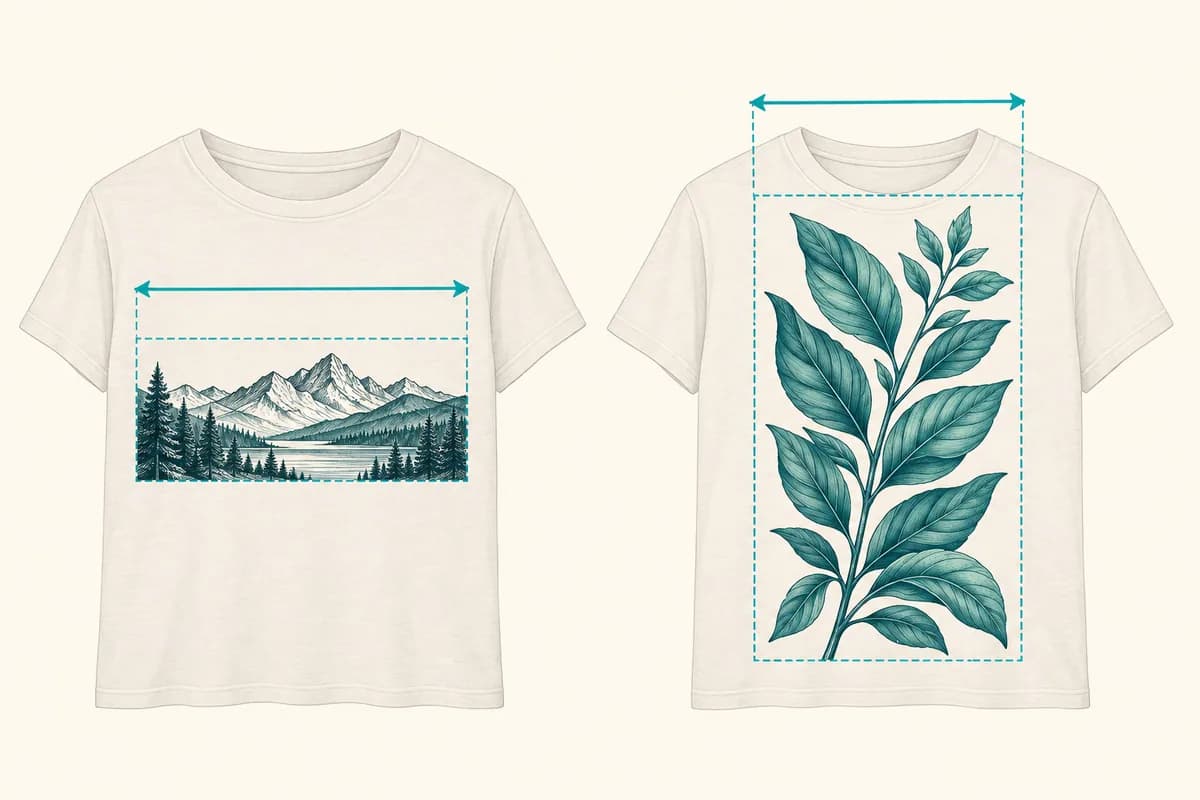
4. Make a paper proof and write down the approved size
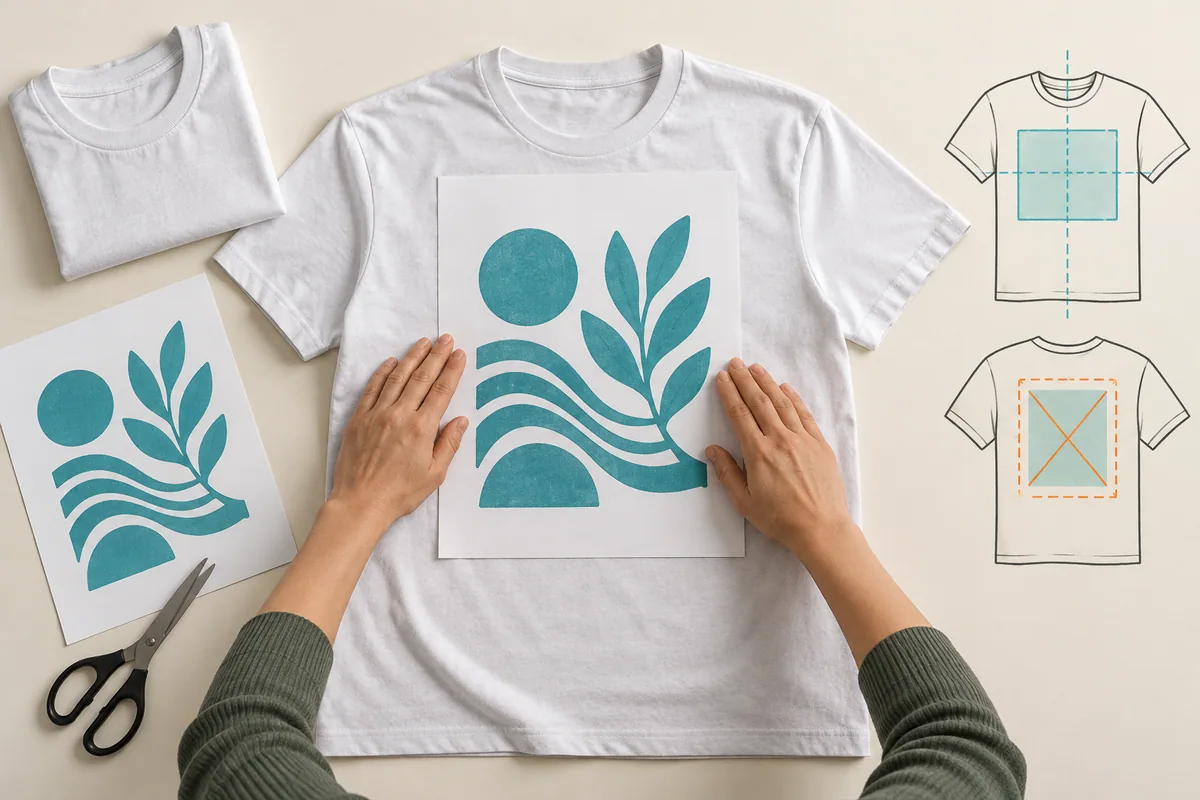
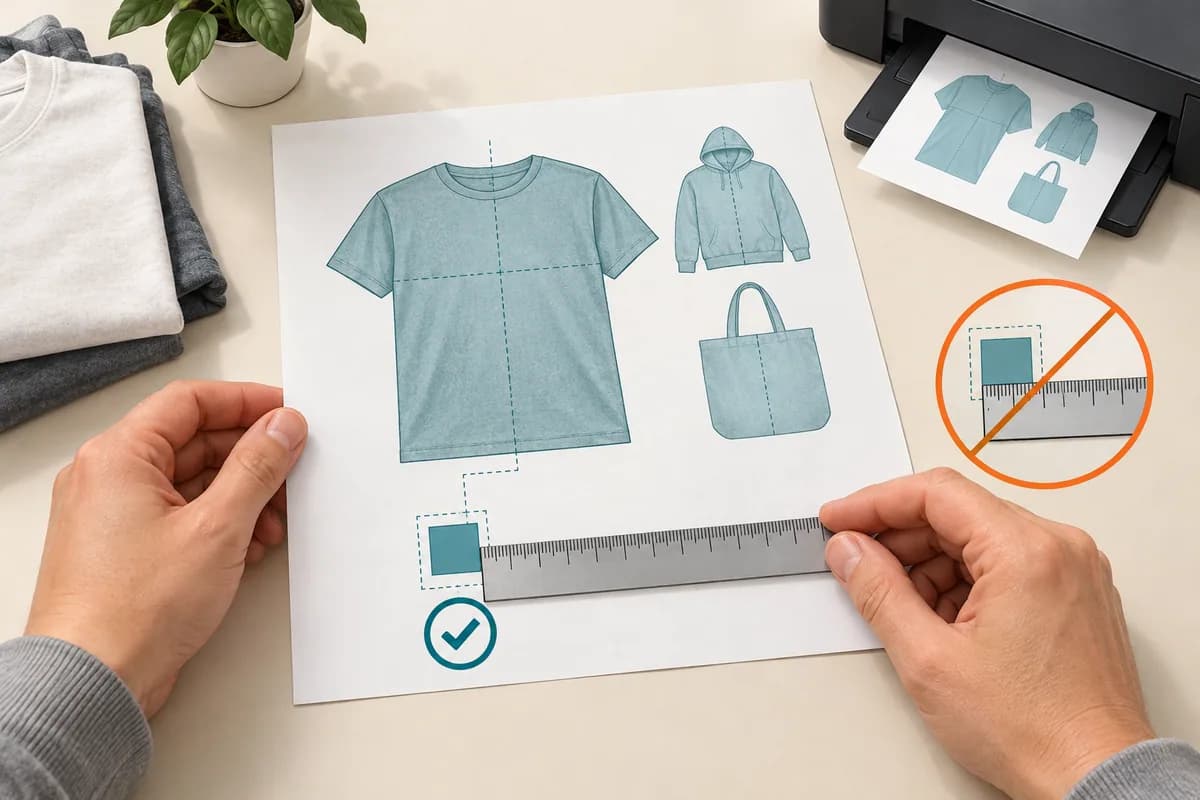
Print an outline or paper version at the proposed dimensions. Select 100% or Actual Size, and turn off Fit to Page. If the design needs multiple pages, use a tiled print or draw its full rectangle on paper.
Measure the printed width and height with a ruler. If a supposed 8-inch print measures 7.5 inches, fix the print settings before judging it on the garment.
Place the paper on the actual garment and check:
- Does it look balanced from a normal viewing distance?
- Is the placement clear of pockets, seams and zippers?
- Can the intended area lie correctly on the available press?
- Does this version work on the smallest garment in its group?
- Are small text and fine details still readable at this size?
Record the dimensions once you approve the paper proof. Keep that version name attached to its file and quantity.
Adapt the measurements to the garment and placement
A starting chart helps you get moving. The garment check tells you whether that starting point works.
| Garment or placement | What to measure or inspect |
|---|---|
| Adult tee full front | Chosen front rectangle; check the smallest size in the run and the design’s height |
| Youth tee | Actual youth garment; test a separate smaller version when needed |
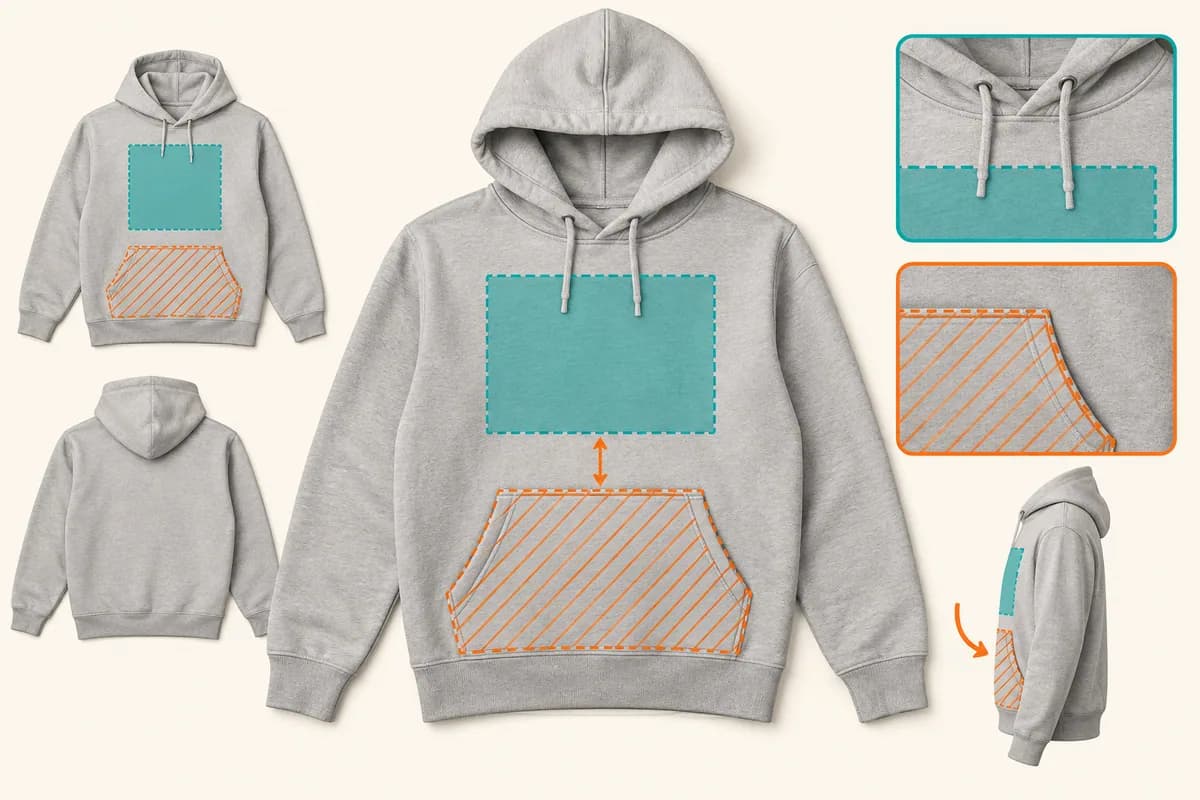
| Pullover hoodie | Clear space above the pouch and around seams; whether the area can lie on the press |
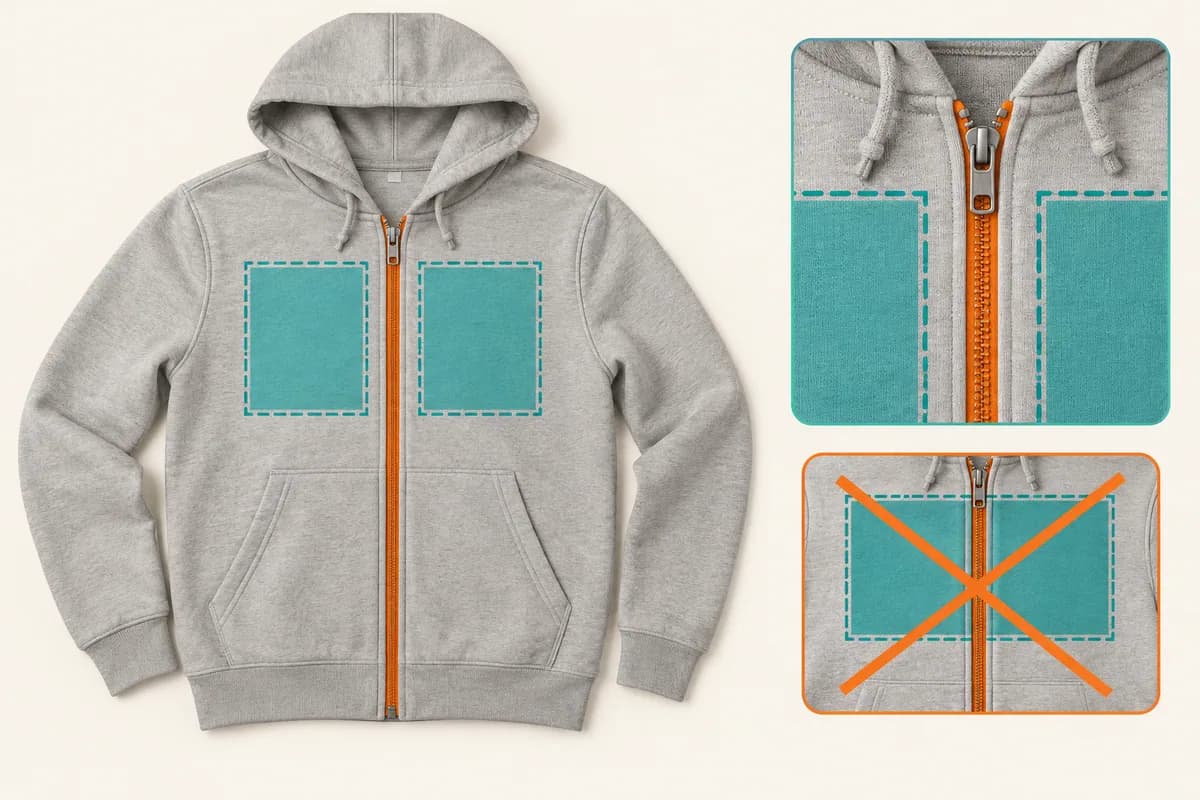
| Zip hoodie | Usable area on each side of the zipper; whether the design needs a different layout |
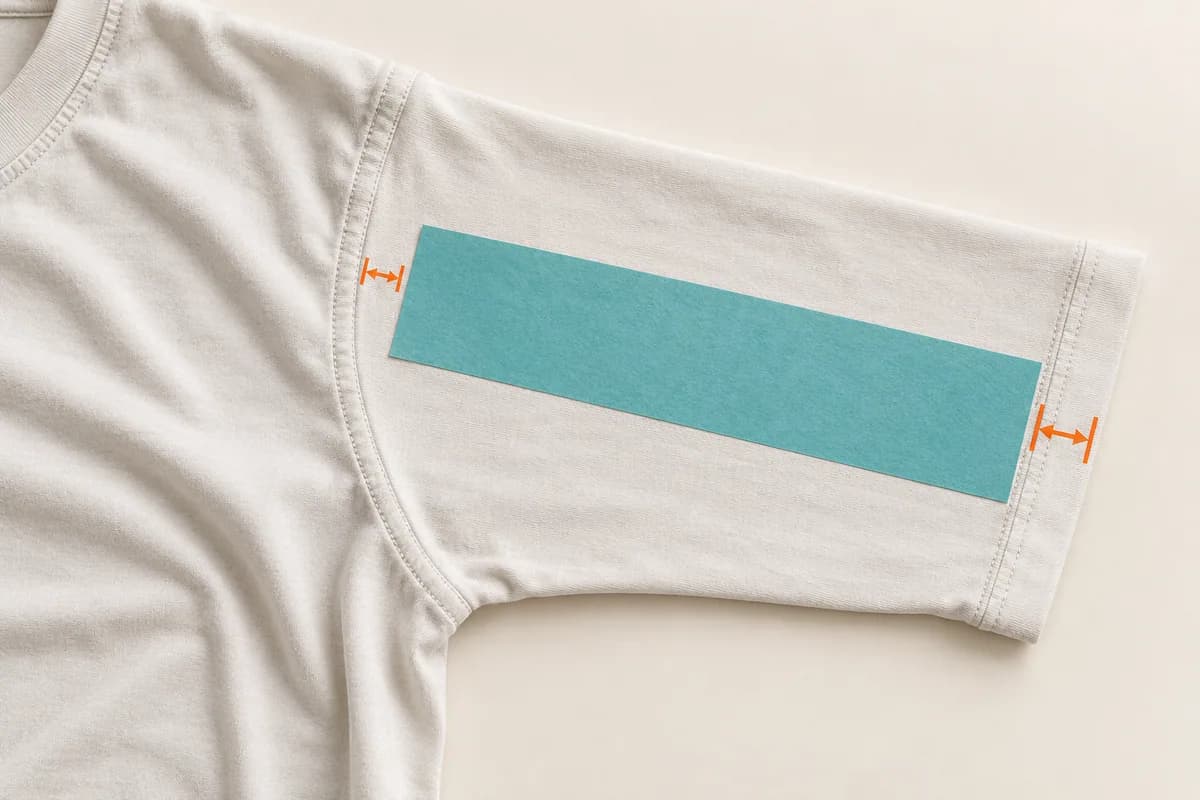
| Sleeve | Unobstructed area and press access; the sleeve’s taper and seams |
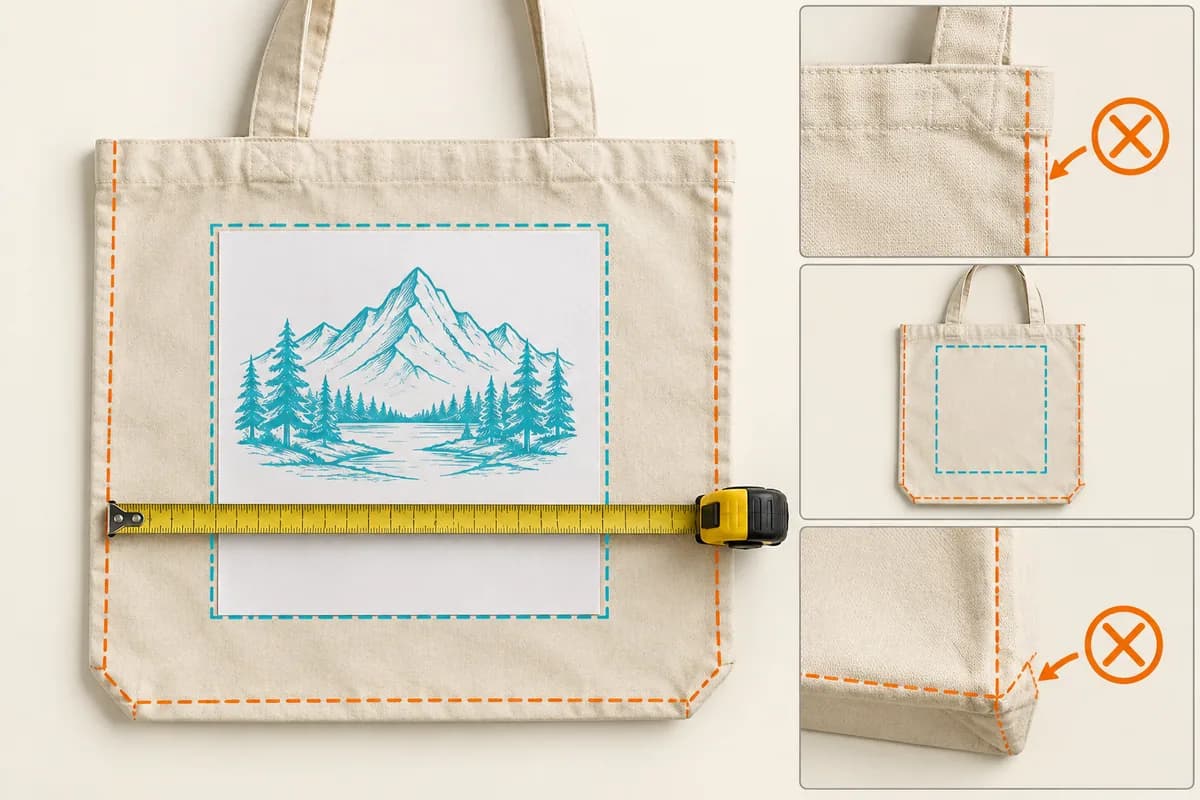
| Tote | Flat panel area between seams, handles and other obstructions |
| Pocket or left chest | Small-placement area and readability; whether a physical pocket changes application |
This is a measurement checklist, not a list of manufacturer specifications. A “large” tee and a “large” hoodie need their own checks.
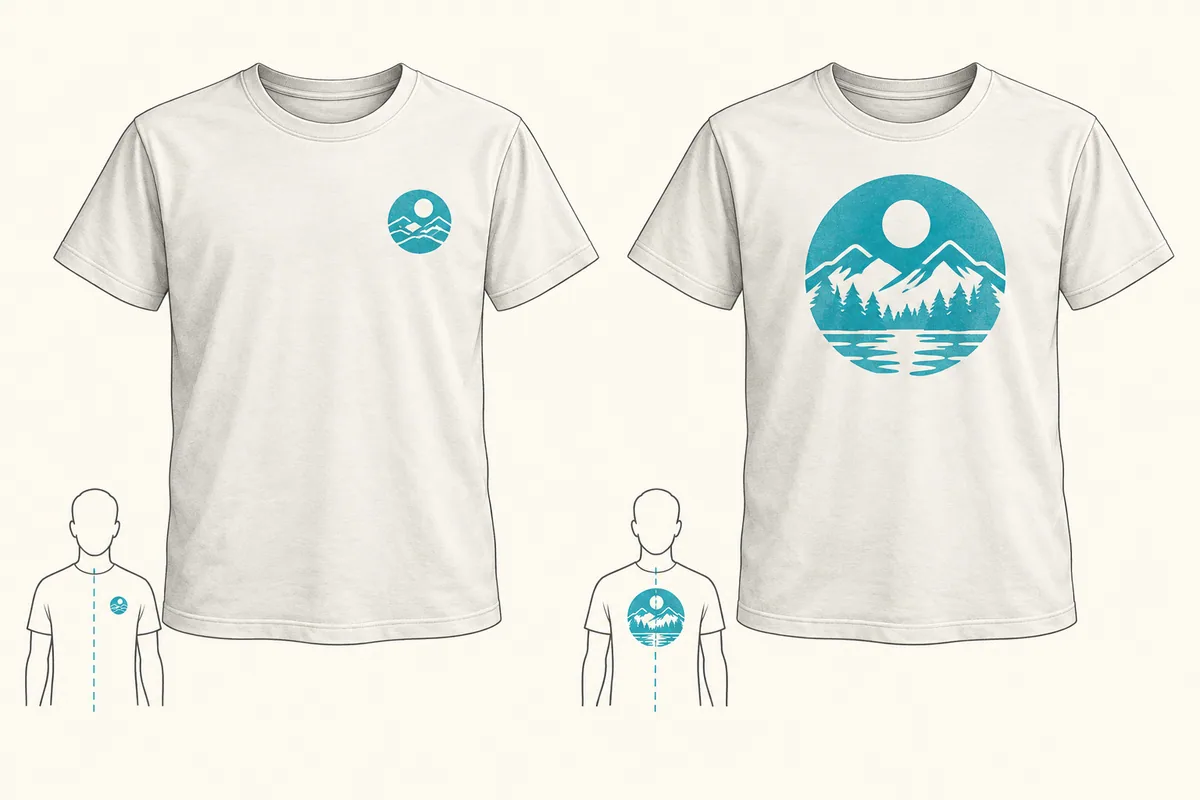
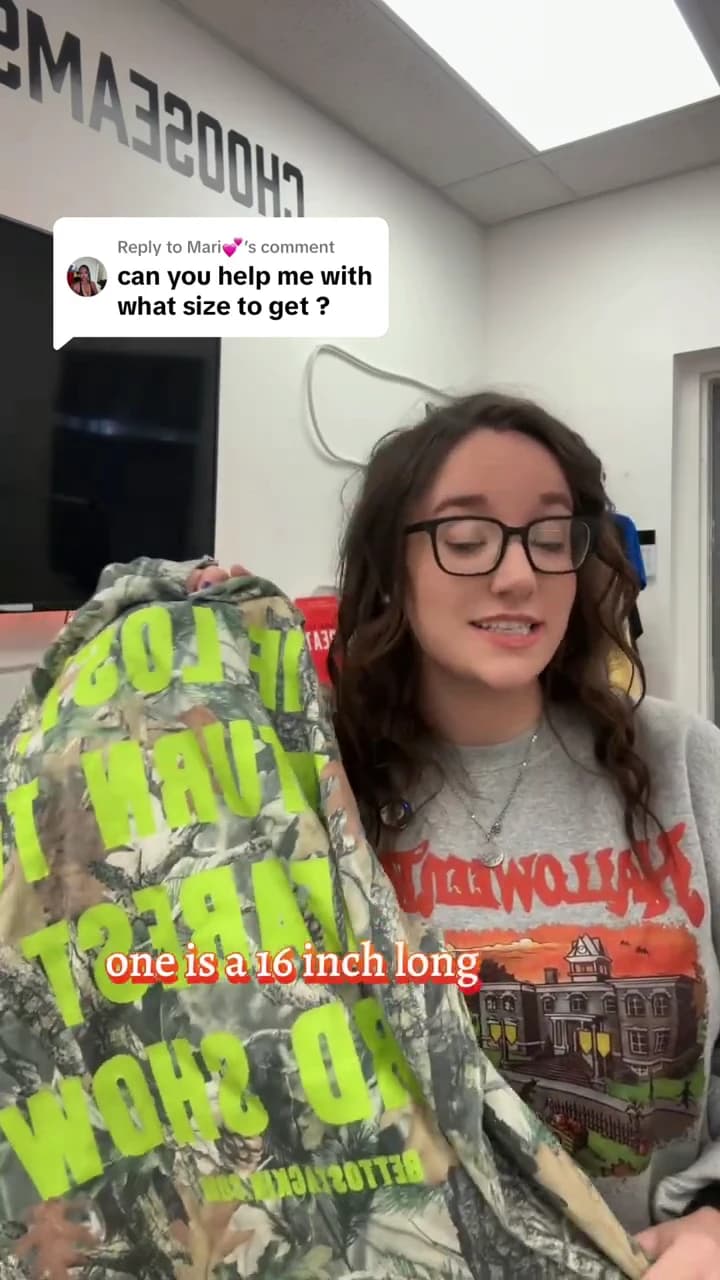
For back prints, use the same width-and-height method. The Short shows varied back examples, including one described as 16 inches long. That is not a universal 16-inch back width. Measure your garment and calculate your design’s actual height before using a large back print.
Front, back and small chest placements
Hoodies and sleeves
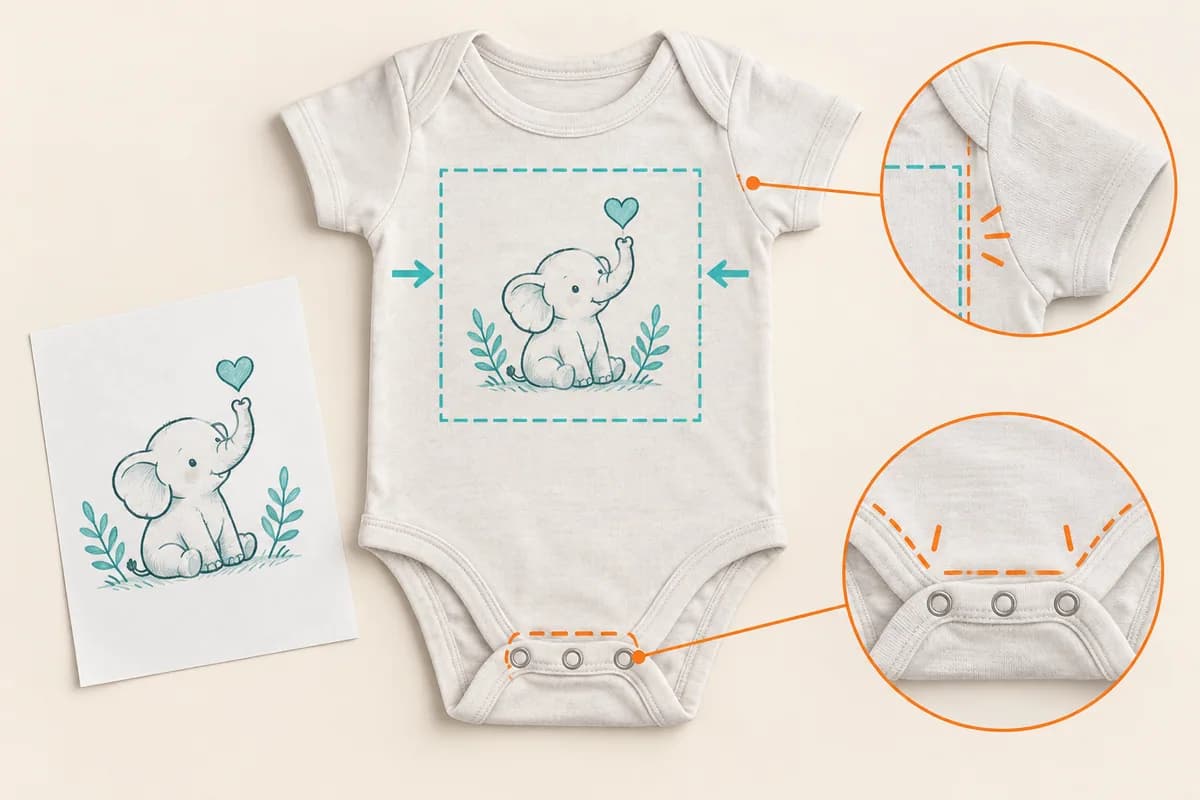
Infant garments, fitted tees and totes
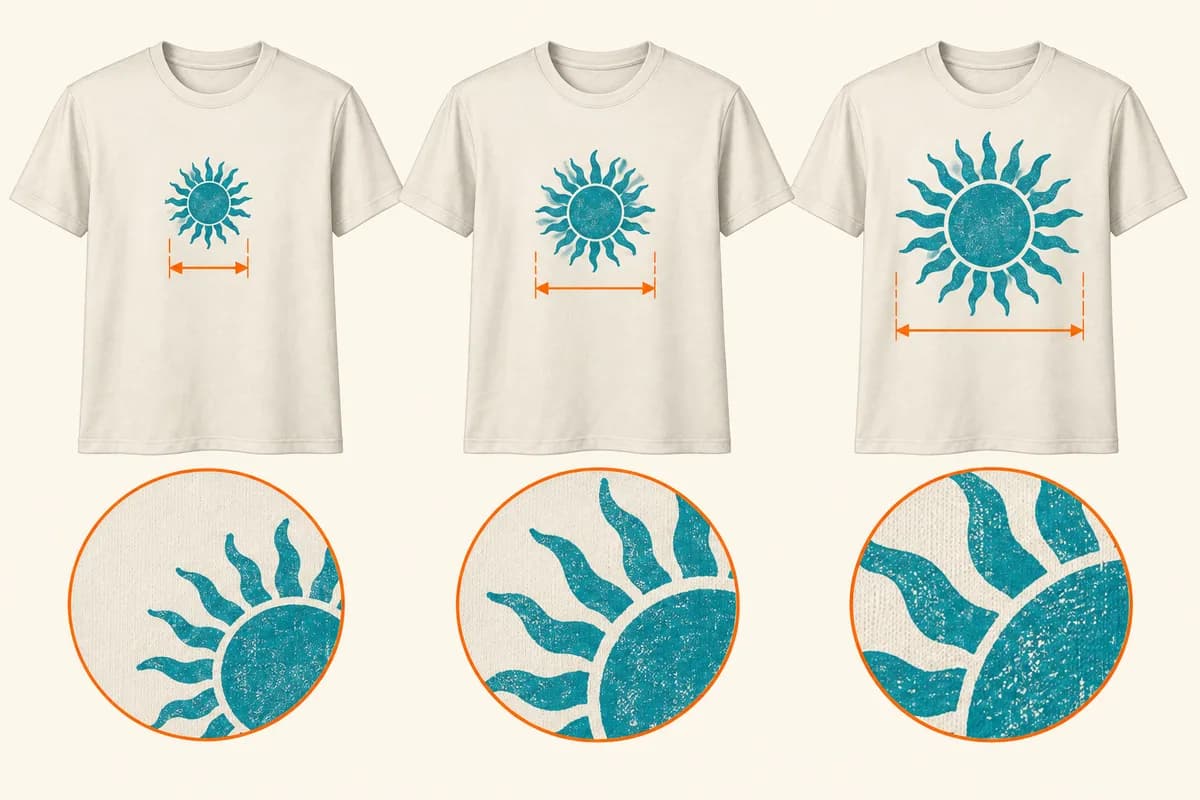
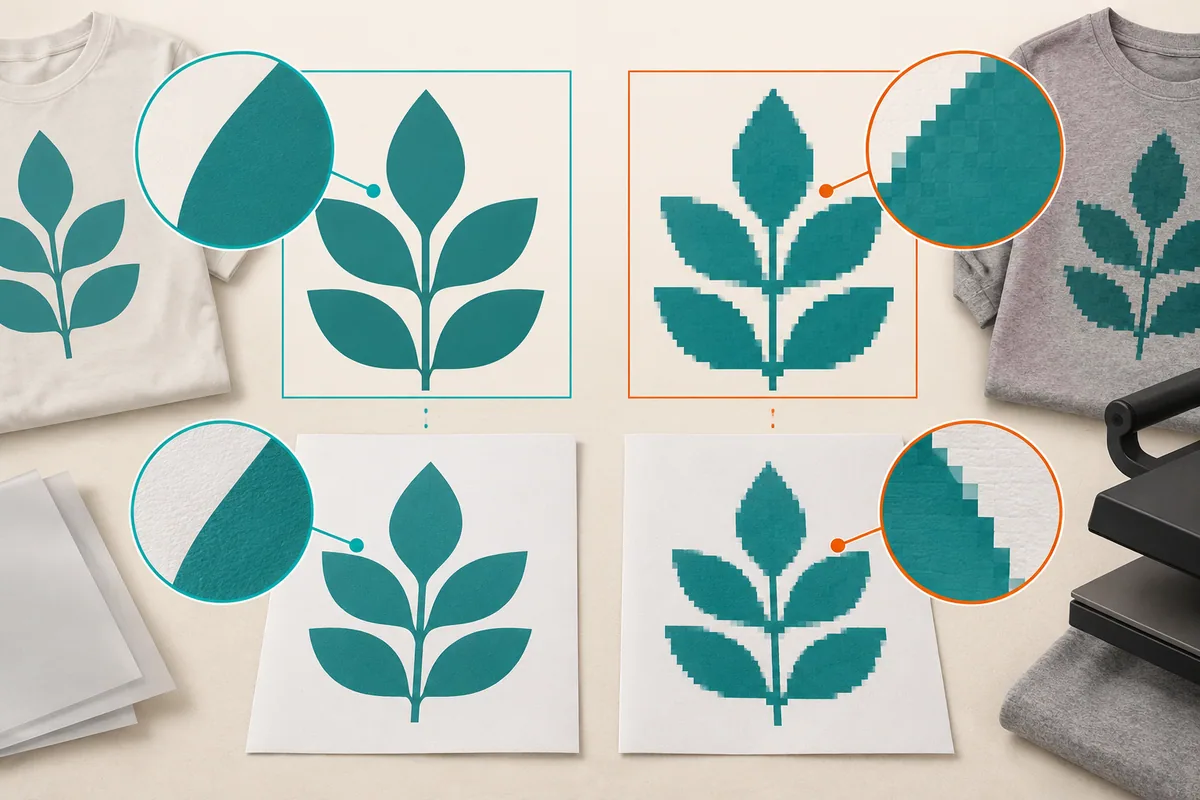
Check raster resolution at the final print size
Pixel count matters at the size you plan to print. For a raster image:
Effective pixels per inch = visible artwork pixel width ÷ print width in inches.
A design with 3,000 pixels across the visible artwork is 300 pixels per inch at 10 inches wide. At 15 inches wide, it is 200 pixels per inch. The pixels stayed the same; the print got larger.
To calculate pixels for a chosen reference resolution:
print width × pixels per inch = required pixel width
At 300 PPI, a 10-inch-wide print corresponds to 3,000 pixels across. This is arithmetic, not a guarantee of print quality. Changing a file’s DPI metadata or enlarging a blurry image does not restore missing detail. Padding can also inflate the file’s pixel width without adding pixels to the visible design.
Review the original file at the intended dimensions. If you use generated artwork, check why AI art can look bad on DTF transfers before relying on a larger export.
Diagnose sizing mistakes before they become an order
| What looks wrong | Likely sizing issue | What to check next |
|---|---|---|
| Print is smaller than expected | Dimensions included transparent padding | Measure visible artwork bounds |
| Design is too tall | Only width was checked | Calculate proportional height and compare both bounds |
| Logo looks stretched | Width and height were edited separately | Restore the original ratio |
| Paper proof looks undersized | Fit to Page reduced the print | Print at Actual Size and measure it |
| Small text disappears | Artwork was reduced too far | Inspect at final size; revise details or use another version |
| Larger print looks blurry | Effective raster resolution fell | Check original pixels at final dimensions |
| Youth version crowds the shirt | Adult dimensions were reused | Measure youth garments and test a separate version |
| Final proof shows the wrong size | Dimensions changed during layout | Recheck each design’s size and count in the proof |
Correcting one issue can create another. Reducing a tall design makes it fit, but may make its text too small. Recheck both the layout and the detail after resizing.
Plan a mixed adult and youth run
You do not have to make a different transfer for every shirt size. You do need to test whether one version works across the garments assigned to it.
Consider a hypothetical Houston school order: 18 adult shirts and 12 youth shirts, all using the same 2:3 design. The decorator measures an adult usable area of 10×12 inches and a youth usable area of 8×10 inches. These measurements and counts are illustrative.
| Version | Quantity | Measured usable area | Proposed proportional dimensions |
|---|---|---|---|
| Adult front | 18 | 10×12 inches | 8×12 inches |
| Youth front | 12 | 8×10 inches | About 6.66×10 inches |
The youth result needs an exact proportional size confirmed from the original artwork; the displayed numbers are approximate. Make a paper proof on an actual garment from each group before approving the plan.
For a Houston pickup or a shipped Texas order, decide how and when you need to receive the transfers as part of the order discussion. Pickup and shipping change the logistics. They do not change the design’s ratio or replace the garment test. Confirm current options and timing for your order rather than assuming a cutoff.
Keep design size separate from gang-sheet size
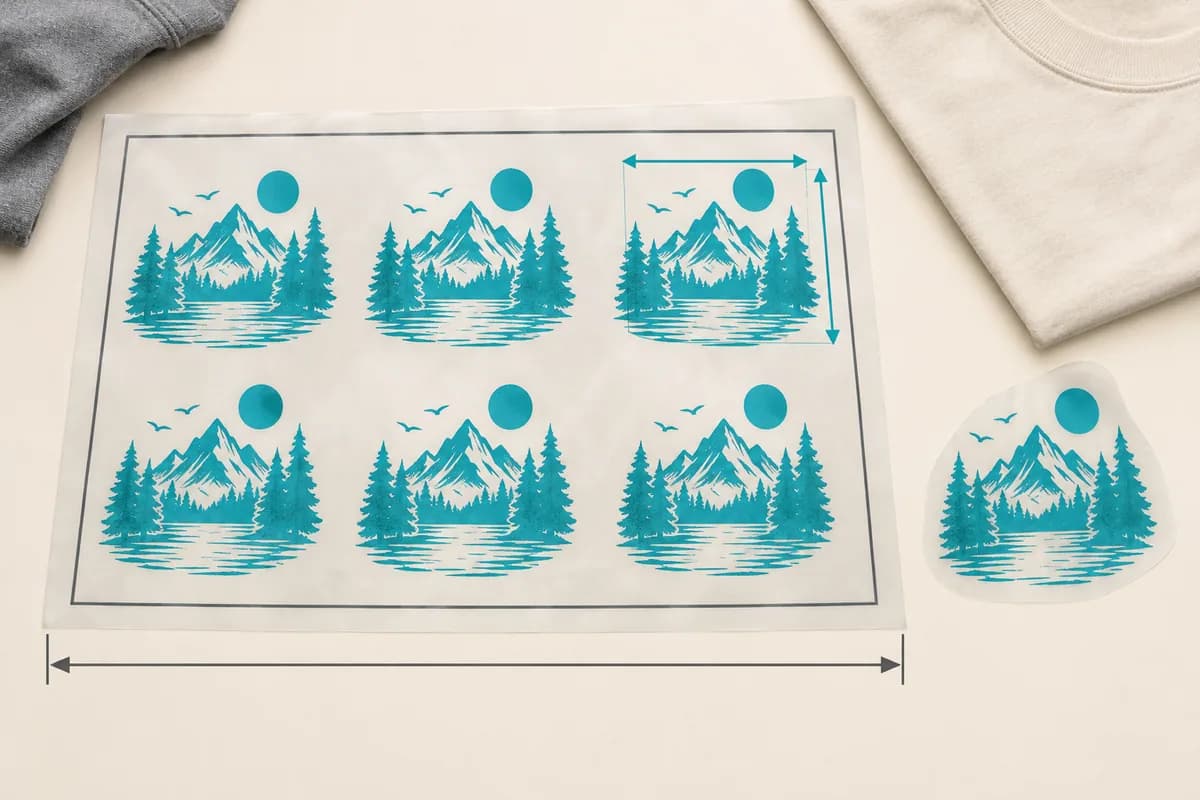
A gang sheet is the overall layout that holds the designs. Each design still needs its own final width, height and quantity.
For the example above, the useful instructions are “adult version, 8×12 inches, 18 copies” and “youth version, original proportions at the confirmed smaller size, 12 copies.” A sheet dimension alone does not communicate that plan.
Once you have your measurements, see how the AMS gang-sheet builder works. Its public guide covers design sizing, quantities, packing and proof review. Recheck the individual dimensions and counts in the proof before ordering. The layout should preserve the sizing decisions you already made.
Copy your transfer plan, then choose your next step
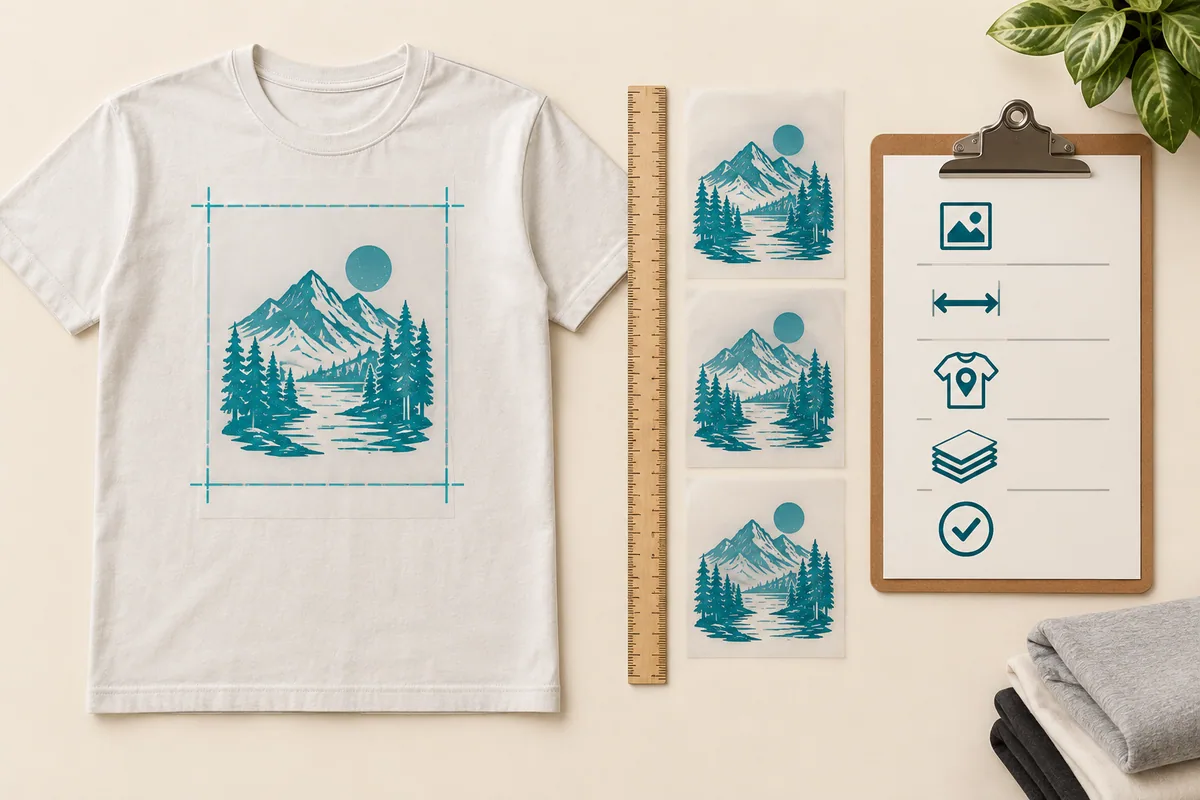
Use the calculator’s preview or this worksheet to keep the request clear:
Artwork/version:
Garment or size group:
Placement:
Visible artwork ratio or original width × height:
Measured usable garment width × height:
Desired print width:
Proposed print width × height:
Quantity:
Paper proof checked on:
Notes about pockets, seams, zipper or press access:
Keep the original proportions. Label approximate calculator dimensions as approximate and have the exact print dimensions confirmed. Leave unknown fields open for review instead of filling them with a guess.
Ready to arrange your sized designs? Open the gang-sheet builder. Need to discuss the plan or resolve an artwork question first? Start your transfer order with AMS and bring the dimensions, placement and quantity for each version.
Frequently asked questions
What size should an adult full-front DTF transfer be?
The AMS Short uses 11 inches wide as a starting point. Calculate your design’s height at that width, then measure and paper-test the actual garment. A tall design may need a smaller width.
How wide should a pocket-size transfer be?
The Short demonstrates 4 inches for adults, 3.5 inches for youth large, and 2.5 inches for youth small/medium. Check the actual placement and readability. A physical pocket can change where and how the print can be applied.
Should I enter the canvas size or the visible logo size?
Use the visible artwork bounds for the fit calculation. Inspect transparent padding and confirm how it is handled before ordering, so the requested width matches the design you expect to see.
Can I make a design 10×10 inches?
Only if it is square or you intentionally redesign it as a square. A 2:3 design at 10 inches wide is 15 inches tall. Forcing it to 10×10 stretches it.
Can one transfer size work for all adult shirt sizes?
Sometimes one version works for a measured group. Test the smallest garment and look at the larger ones with a paper proof. Split versions when fit or appearance calls for it.
How do I size a tall design?
Calculate height at your desired width. If it exceeds the measured usable height, calculate width from the height limit. Check that reduced version’s text and fine details again.
Does a calculator fit mean the transfer is press-ready?
It means the proportional dimensions fit the measurements you entered. You still need to check the garment, obstructions, artwork and available press, then review the final proof.
What size should I use for a back print?
Measure the usable back area and apply the same proportional calculation. Treat dimensions in a demonstration as examples. Keep “wide” and “long” distinct when recording your size.
How do I check a paper proof?
Print at 100% or Actual Size, measure both dimensions with a ruler, and place it on the actual garment. Turn off Fit to Page; tile the print if it will not fit on one page.
Can adult and youth versions share a gang sheet?
Plan them as separately sized designs with their own quantities. Check that both versions retain their dimensions and counts in the final layout and proof.